Important Notes before Installation for recessed IP67 LED Inground Lights:
▪ When installation, always work with professional and liciensed technician, or install by professional and liciensed technician.
▪ Before installation operation, please turn off or cut off the power.
▪ The standard input voltage is 24VDC or 220-240VAC or other.When you install the product ,please check the data label on the product and the wire, otherwise, the lighting fixtures may be damaged or burnt if input wrong voltage.
▪ When use low voltalge lighting fixture, please prepare powerful LED power supply or 24VDC output type LED transformer. (1) The total demand of power is according to the total power consumption+total power of the cable impdedance consumption.(2) It is advised the max actual output power of the LED power supply is more 25% at least than the actual total power consumption of the LED lighting fixtures, otherwise, the LED lighting fixture may be flashing, or cannot be power on the lighting fixtures, or the power supply may be damaged.
▪ The main material of the most of our LED inground lights are aluminum,surface coating is only suitable for natural environment, do not install this product near the sea water or in the environment which is high salty or high acid.
▪ IP67 grade product.
▪ Applicable environment temperature: -20℃<fixture<40℃.
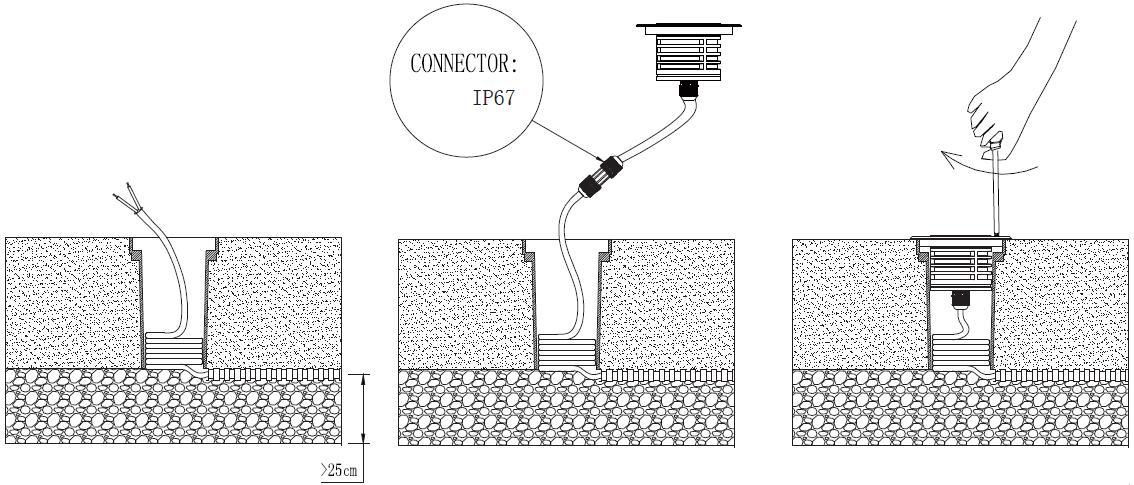
IP67 Recessed LED Inground Light Installation
|
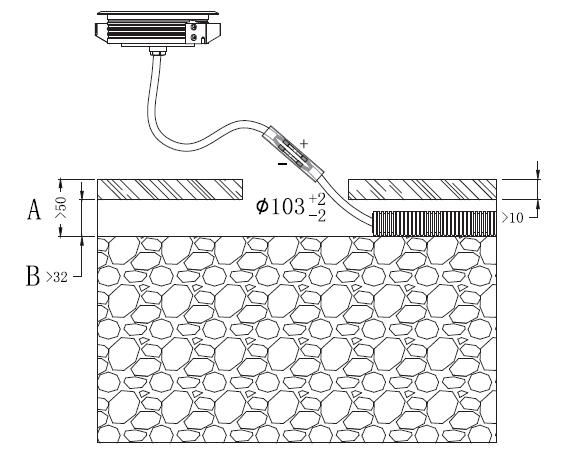
Install the mounting sleeves on the ground, the top side should be on the same level with the ground surface, power cable need to go through the mounting sleeve Note: The thickness of the gravel must be greater than 25cm. |
Connect the power cable with the lighting fixture. *keep enough length for maintain* |
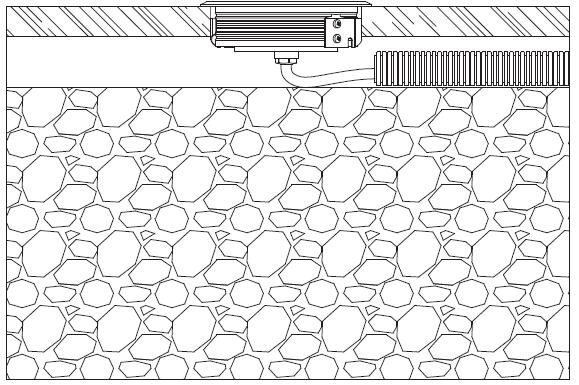
Fix the lighting fixture with the mounting |

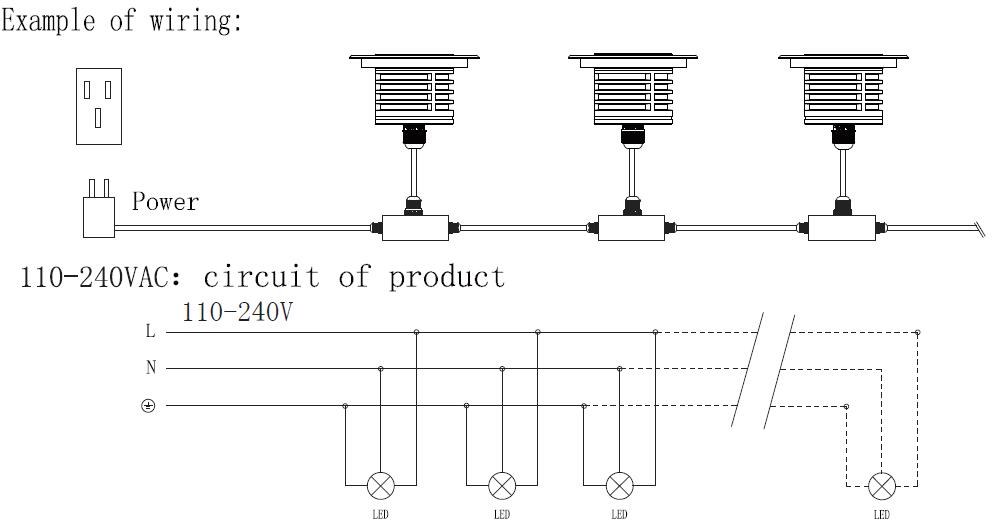
Wiring diagram for high voltage LED lighting fixtures.
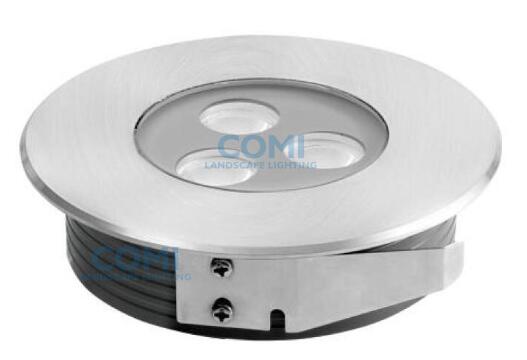
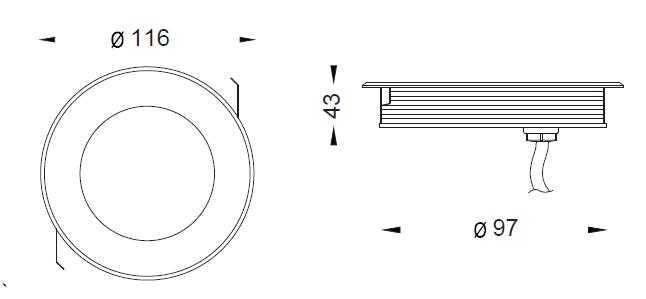
(Recommended product: FB2XBR0357 FB2XBR0318 3x3W Thin Recessed Wooden Floor Light)
 |
 |
 |
|
Installation conditions a) Cut hole: Recommend the cut hole∮103mm. Request to install on plain floor, vertical efficient deepness must be over 50mm, thickness of floor have to over 10mm. b) Connect power cable: Pull the pre-embedded power cable from conduit and connect to fixture with isolation water-proof treatment. Remark: Power supply must accord with standard on fixture label and connect positive and negative correctly. |
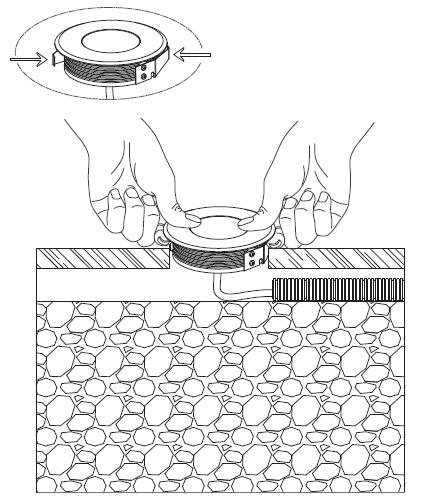
Installation Press two sides of springs separately by index fingers in order to put it into cut hole smoothly. Tips: In order not to be jammed, pls push a part into cut hole first and then push it completely by fingers to press two sides of front plate. |
Finish installation a) Check if light direction is correct. b) Check if it’s parallel to the joint between fixture and floor. c) Check if it’s pulled easily. |
Wiring Diagram (For 24VDC type LED inground lights only):
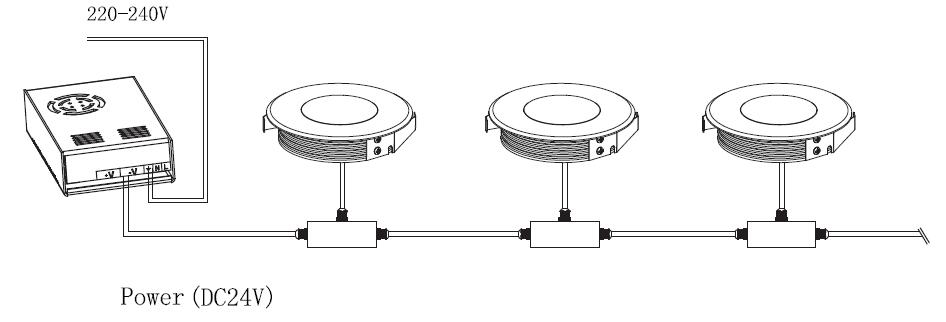

Note:About wiring diagram of Tunable white, RGB, RGBW or high voltage 220-240VAC type LED inground lights, please inquire us separately.